
Friday, February 19, 2016

My Gripes on Training Plans


Today's blog I am going to dump on (from my prospective) the many training plans that are out there.  Floating on the Internet.  Free to grab (many of them) and some that you have to pay good money for. 
OK, before I start, I would like to get one thing clear.  A training plan (in a general sense) is a good thing.  Like the old saying goes, he or she who fails to plan, plans to fail.  So my beef is not against having a training plan, my beef are these so called experts who sell or handout a free "Half or Full Marathon Training Plan" on the Internet that are geared to some excited new runner that may not know a lot.  The "training plans" are supposed to help you safely train for a special event, but more than likely they contain so many short cuts that are so unsafe in my opinion just so you can get excited about some race that you may or may not be ready for. 

Why would anyone who is trying to sell a plan or a book tell you "No, you are not ready for that Half Marathon" in 18 weeks.  Off course they say, yes you can, buy my book or download my training plan to see how.
OK, to admit, I have not seen more than a couple when I first went training plan hunting and maybe I am being too critical.  I don't know.  I also observe some others that follow a pre-establish training plan and am quietly boggled as to why their plan is telling them to do certain things.  Before I get into my gripes, let me share my personal experience.

It was Monday October 13th, 2013.  Columbus day to be exact.  It was a day off from work and our daughter was going to be in school.  My wife and I made a date to go workout together in our apartment complex gym.  We have been a bunch of couch potatoes the past year and we decided to make a date to get back into shape together.  I had about 50 pounds to lose and she had... well she had some pounds to lose as well.  We were going to start together and encourage each other.  So we went into the gym in our apartment complex (they just opened it up a week earlier after months long renovations).  After messing with the free weights and machines we jumped on the treadmill.  I got in about 3 miles.  I don't remember how many she got in.  But this was the start.  I would actually continue this before going to work in the morning about 3 times a week.  I reactivated my account on myfitnesspal to track what I was eating.  I then for the first time, went into the forums on myfitnesspal and started making friends with strangers that were runners.  I signed up for the Beginners Challenge - 50 miles in November. This was a fun way to encourage me to run my miles for the month of November and met some interesting people. 
I actually ran 72.64 miles that month (all on a treadmill).  I wanted to do more than 50 miles that December and thought the idea of a virtual challenge was fun.  So I started my own thread for December.  I actually ran 112.1 miles that month and some of that was actually outside.


I then bit the bullet and signed up for my first 10K.  The UAH Spring Road Race, set for March 2, 2014.  Soon after that I signed up for my first half marathon.  The Bridge Street Towne Center HM set for April 13th, 2014.  After placing 217 over all with a 1:58:07 finish, I got really daring.  I decided to sign up for the Rocket City Marathon for December 13th, 2014.  Up until now, I just kind of winged it.  I took some advise of some people that were more experienced runners from myfitnesspal, but I really didn't know exactly what I was doing.  I already started reading some articles in Runner's World and learned some things here and there, but preparing for a full marathon was serious stuff.  I needed a "training plan".  Runner's World had some training plans but you had to pay for them.  So I did a google search and found this guy Hal Higdon who was supposed to be some expert running coach that had training plans on his website that you could down load for free.  So I took a look at the Beginner's Marathon Training Plan.  It promised me to get ready in 18 weeks.  So I was counting on my fingers, and that would have me starting this plan in the second week of August.  It was the very end of April.  Week 1 started somewhere around 13 or 14 mile week with I think like 6 miles for the long run.  Uhh...  I am a little bit further along then that.  So what did his Intermediate plan have.  16 mile week with an 8 mile long run.  You kidding me?

I just got done with a half marathon.  I have been doing 14 mile long runs for the past month.  And maybe double that for the week.  And I have to wait 3 months to start this plan?  What am I supposed to do in the mean time?  Slow down?  I am just getting warmed up. 

To make a long story short, this is when I first got started about learning how to train.  My wife got me the Runner's World Big Book of Half Marathon and Marathon Training.
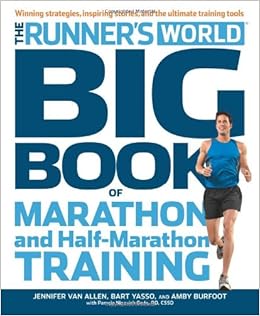

I read and studied it religiously, I read everything I could in the myfitnesspal forums, I asked everyone I knew that was more experienced than me.  I even joined a couple of local group runs in my town (when I first joined the Panera Pounders).  I was now a serious runner.  The more I learned, the more that I came to understand that these plans had some serious flaws in them that confused me.  These plans were designed by experts, but these experts contradicted good sound running advise that I read elsewhere.  Which one should I follow?  The plan or the concepts?  The concepts won out as I soon learned how to develop my own plan and have been doing so since then.

And here is a list of things I have beef about the few training plans that I have reviewed. 

1.  They are designed for a statistical average.  Do you represent this statistical average?  Now Hal Higdon is a heck of a running coach and I believe he knows what he is doing.  But does he know me?  Does he know most of the people that download his plan?  Nope.  He wrote these plans to meet the minimum requirements so you can just barely make it across the finish line without seriously injuring yourself if you meet some kind of statistical average level of fitness.  It gives someone who has absolutely no idea what they are doing, who is only running this marathon just to say they did it (may never ever do another one ever again) some kind of structure in their training for the next 18 weeks while following some important concepts.  You may be way ahead of the curve, or you may be way behind the curve. One just doesn't know where they fall.  But it's better than nothing, right?

2. They really are written as guides, but most people that follow them take them as absolute doctrine.  People get stressed out if they cannot make their 14 mile long run in week 12.  What am I supposed to do now?  Will I not be able to run this race in November because my sister's bridal shower is on the same day as my planned long run for this week?  Will it screw me up that bad?  Worse yet, I just found out that I cannot do my last long run before taper.  Do I repeat the week and cut my taper short or risk running this marathon on only done a 17 mile long run when my plan called for me to go up to 20?  This brings up my next gripe.

3. You are only allowing yourself 18 weeks to train for this marathon?  It's like cramming all weekend for your college finals.  Remember those days?  You procrastinated all semester long, then realized you were not ready for that final next Tuesday night.  So you locked yourself in the library all weekend to study for this thing.  Well, this kind of reminds me what following one of these plans can be like. 

Here's a few tips.

·          Don't count back 18 weeks from your race and then decide this is when I will start my marathon training because...   well because the plan told me this is when I am supposed to start my training.  You can actually start the plan like...  NOW!  This week.  Even if the race is 30 weeks away. 

·         You don't have to start at week 1.  If your current level of training fitness resembles week 8, then start there.  Now you have plenty of more time to train for this race.  Now if you wanted to, you can repeat weeks, you can even skip parts of some weeks (in case you think your evil sister in law is out to ruin your training by inviting you to their baby shower 5 weeks before your race).

·         If you do decide to start at week 1, give yourself more than the 18 weeks than what the plans leaves you.  Just in case your ability to increase mileage is not as aggressive as what the plan may call for.  Some folks can increase mileage faster than the statistical average, and some may even take much longer.  The sooner you start the plan, the more weeks you give yourself in increasing mileage.  Again, if you need to repeat weeks or even insert more cutback weeks, you can, but only if you gave yourself more time upfront.  You definitely need to follow this tip if you are injury prone.

4. Many beginners and intermediate plans (well the ones I saw online) are only interested in you building up mileage and then taper just as you reached your peak mileage.  This is not how elites and more experienced runners train for marathons (or half marathons).  This would only be considered the base building stage.  Once they come close to their peak, they maintain it for their next stage and start adding in quality workouts while their weekly mileage remains high.  So if you followed #3 and gave yourself plenty of time to build your mileage, then most likely you will come very close to your peak with many weeks still left before your race.  Maintain this mileage and start adding in some tempo work or other what we call "quality workouts".  A good training plan is not, "let's see how fast we can get to our peak mileage and time it perfectly just before the race".  If you understand periodization, mileage building is only one meta phase in an overall training plan that will last all year long.  And in most good year long plans, that is called base building and occurs near the beginning, not the very end.

5. Hard workouts while building mileage.  This is a continuation of my previous gripe #4. You will see many plans out there that have you doing tempos or speed work while you are building mileage.  If you never ran a certain mileage before, then only run at an easy pace.  Don't worry about tempos or VO2max speed workouts, or hill repeats.  Make them all easy paced.  Just the mere fact you are building mileage is a major accomplishment.  Don't stress the body more and risk injury by adding workouts on top of that.  If you are an experienced runner and just base building?  Then run them all pretty much easy while building that base, then move onto the workouts after base building is done.  Again, this may take more than 18 weeks for beginners (but much less if you already ran the distance before).  So build your mileage near your peak, sustain it until you are acclimated with the mileage, then add in tougher workouts. 

6. My next and biggest gripe is the long runs.  Many plans concentrate on how fast you can build up that long run.  In most of the weeks, your long run represents about 50% of your total weekly mileage.  Most of the expert advise tell you that your long run should only be between 25-33% of your total weekly mileage.  This one always baffles me.  Why are so many plans breaking this rule?  The famous running coach Jack Daniels adds another restriction, a long run should not exceed 2-1/2 hours.  So if your plan calls for you to run a 20 miler, and it took you 3 and a half hours to run that 20 miler, then you are risking injury big time.  A good plan will have you increase the mileage during the week as well as your long run.  Again, your long run shouldn't make up more than 25-35% of your total weekly mileage.  If it does, then cut your long run short and start increasing the other runs more or add more runs in during the week.  You can get away with 4 maybe 3 runs a week.  But 3 runs a week will mean that there is no long run; that all of your runs will essentially be "long runs".  Also, once you come close to 150 minutes, cut your long run right there.  There are a few coaches that suggest a maximum of 3 hours for a long run.  I personally tend to run at least a couple of my long runs around 3 hours when I am getting close to my peak marathon training.  But I don't make a habit out of it. 


EDITED:  See my blog on Long Runs based upon comments from this blog.


7. Mileage Build-up  To me, this defines your training plan.  This is what in my opinion distinguishes one training plan from another.  (That and the way you insert quality workouts.)  There are so many theories on how to increase mileage.  Here are a few of them:

·         10% Rule:  This rule states that you only increase your weekly mileage next week by no more than 10% of what you did this week.  This is a very common rule that is also highly debated.  The main debate is that there is no science behind it.  That 10% is just some round even number that looks nice. 

Also if you did 17 miles this week, do you add 1.7 miles and make it 18.7 miles next week? What about the week after? 1.87 miles making it 20.57?  Those decimals are going to get ugly real quick.  

·         Add a mile a week (or every other week):  This one is a safe rule for those that are very injury prone.  Is this too aggressive or not aggressive enough?

·         Dr. Jack Daniels: For how many days (or workouts) a week you run, that is the number of miles you can increase by; but hold that for 4 weeks before increasing again.  So if you ran 7 times a week (for example once in the morning on Monday, once Monday evening, once on Tuesday, once Wednesday morning and once Thursday evening, and once on Saturday, and once on Sunday) then you can increase your weekly mileage by 7.  So in this case, if you ran 30 miles for the past 4 weeks, then run 37 miles for the next 4 weeks.  Then run 44 miles the week after.  (NOTE: Jack puts a cap of 10 mile increase.)

·         The above are just some of the basic ways you can increase the amount of mileage.  Different coaches have different philosophies and different reasons on how to increase mileage.  The way to add mileage becomes more of an art as well as a science.  And there are different ways you can apply it.  Apply it to just one of your workouts per week? or you could add a little to each run during the week.  But don't just add it to your long run only.  However you apply your mileage increase, make sure the increase is balanced across the entire week.  Remember, your long run should only represent 25-35% of your entire weekly mileage.

8. Cutback Weeks:  Just as you progress in your training plan to increase mileage, you also need weeks where you cutback your mileage for a week.  These cutback weeks (or down weeks) are required to allow your body to adapt to the training from the previous weeks before you can move on.  It allows your body to recover and strengthen, preparing you for next week's challenge.  A certain plan may have you increasing mileage for 3 weeks in a row, cut back mileage for a week, then move on an increase again.  Some plans have you increase, hold that mileage for a number of weeks, cut back 1 week, then increase again.  Some have described this as a stair step progression.  How often you insert a cutback week depends on many factors.  Some insert one in every 3 or 4 weeks.  How much you cut back is also dependent.  Some decrease 15-20% and some may decrease by as much as 50%.  Usually you cut your longer runs shorter or replace a day's workout with an extra rest day (or some kind of mix between the 2).  usually you can feel when you need a cut back week.  Your body get's very sore and recovery for your next workout seems to be not enough.  If your training has been progressing or held high for a number of weeks in a row?  Maybe you need to cutback some miles this week.   Many training plans preplace cutback or down weeks already. My gripe I guess would probably be placing the cutback week too often or not often enough.  Just as it is with mileage increase in #7 inserting cutback weeks becomes very personal.  Learn to let your body (and sometimes personal life outside of running) dictate when to take these.  But take them.  If your body doesn't need one, then maybe you're not stressing it enough? 

9. Junk Miles:  This is an interesting term.  The concept is that you shouldn't run miles just for the sake of running them.  You should have a purpose behind each run.  When every day you run you seem to run the same pace and maybe distance, the body may view this as monotonous, and becomes very efficient at the workout.  If this occurs, then the run may be viewed as a waste of time since you are no longer challenging the body to provoke a training stimulus.  To make this argument, you would have already developed a base and reached your peak for the number of weekly miles you like to sustain.  There are some plans that are written with the idea to lower the number of weekly miles you will peak at by only running a certain number of days, but on those days you are running very hard specific workouts.  Under these plan's philosophies, adding in more workouts (usually at much slower easy pace) are nothing but junk miles and do not contribute to your physiological development).    Personally, I do not have a problem with these extra slower days.  There are days where my legs are tired, but instead of calling it a rest day, I will run a limited number of miles on a flat surface at a much slower pace than I normally would.  I call these days my "recovery days".  I actually find that I am more recovered for my next harder workout if I ran this "recovery run" then if I took a complete day off.  Now are days off necessary?  Yes, at times they are.  And I consider them as part of my cut back weeks.  I personally allow myself only 1 day of complete rest per normal week to maintain the number of miles I run.  You can read more about junk miles and recovery runs else where.

10. Types of Runs: So we already stated that running the same distance the same pace every day can be monotonous.  You do have to change it up.  Change the route, change the distance, and maybe change up the pace.  As I stated earlier, I personally recommend that every run should be at a conversational pace as you are building the mileage.  Once you establish the maximum number of miles a week you think you need to run and sustain, then you can consider different types of runs.  This could mean fartleks, tempo or threshold runs, some speed work intervals, or hill work or many other types of workouts.  The only other run type not mentioned is the long run, and that should be a part of your week even as you are building up mileage.  When I plan a week's worth of workouts I consider that most of my weekly mileage will be no more than easy conversational pace with some workouts thrown in.  Matt Fitzgerald wrote a book called 80/20 Running which speaks about this.  According to his very popular theory, only 20% of your weekly mileage should be anything faster than easy paced.  This is to allow your body to recover fully to efficiently execute the next hard workout and still maintain aerobic fitness.  I personally may have 1 or 2 hard days then followed by an easy recovery day before my next hard workout.  Again, this is necessary when I run 6 days a week.  Most experts believe that you should only have 3 quality days a week (meaning a harder workout) with the long run being one of those quality days.  Attached to this advice is that you add in easy recovery or complete rest days in between these harder days.  Again, my gripe is forcing a newbie runner into running a harder pace when they are not ready for it. 

11. Doubles:  In order to get the number of miles a week that you need, sometimes you need to run once in the morning and again at night some days.  Once you get past 55-60 miles a week, it gets real hard adding mileage without getting into too many miles in a single run.  Many plans will have you run a quality workout or long run in the morning followed by an easier recovery run that evening.  Running twice in a single day isn't really necessary until you get into the higher mileage range (usually past 55-60) or your non-running schedule (life happens) forces you to modify your plans. My gripe here is breaking your long run up.  You can break up most days into 2 runs, but I highly recommend that you don't do this with your long run.  If you need to, move your long run to a different day or time in the week as oppose to breaking it up into 2 separate runs.  There is a purpose behind the long run that you won't benefit from if you break it up into 2 different runs. 

12.  Cross Training: So what else can you do other than running to make yourself a better runner?  To me, the more you run, the better runner you will become.  This is the same principle if you were learning to swing a baseball bat or golf club to juggling.  The more you practice something, the better you will become at it.  Your mind and muscle fibers will learn to run more efficiently when tired when you practice running when tired.  When you are working on a certain part of your running biomechanics, you become better at it when you do it more often.  The particular muscle cells associated with running will improve cardiovascular wise (blood capillary beds and mitochondrial development) only by running or similar movements.  Now, is there a place to do other things?  Yes.  Some like to bike or swim to maintain aerobic fitness if they get bored with running all the time. Or may do so while injured or on a rest day.  Performing drills are a great way to isolate and practice certain improvements to biomechanics.  Strength training most likely will become necessary to improve the strength of underdeveloped muscles to improve performance and prevent injury.  Yoga and stretching exercises are great to improve flexibility and range of motion and become a valuable part of your recovery.  Just as foam rolling and other myofascial release techniques are also necessary to your recovery.  Some plans include cross training already.

13.  Listen to Your Body: it is very important in becoming more in tune to your body.  Know when you can push it further, and know when to dial it back.  You need to know what's the difference between a soreness that you can work through and an injury that will require you to stop altogether.   A training plan is great to follow, but if your body is telling you that you are doing way too much, you need to divert from your plan and let your body be the master (not the plan).  This goes back to #2 above.  The training plan should be more of a guide, not doctrine.  If your plan included one-on-one coaching, and if you have a good coach, they would constantly be asking for feedback.  How did you feel on this run? Did you feel like you could have done more? How recovered did you feel before this next workout? What was your heart rate during this particular workout at this particular pace? How does your resting heart rate compare from the last 3 weeks?  Have you noticed your sleep being effected at all since you have been training?  These are all things that will effect how you progress in your plan.  To me, you have to know how to modify your plan in order to efficiently follow it when necessary.

14. Life:  Training is a commitment.  You may need to learn to sacrifice things in order to train properly to reach your goals.  But sometimes, life outside of running may become more important.  If you were up late in the emergency room with your 3 year old son, should you go on your long run the next day on 3 hours of sleep?  I would advise you not to.  Sleep and good nutrition and good mental rest are all important.  Like a wise man once said, man shall not live on bread alone.  Nor should they live life in running shoes alone either.  Sometimes it is important to go to that baby shower that your sister in law was nice enough to invite you to, even if it is 5 weeks out from that important race.  So what if your plan said to run 17 miles instead?  Find another way to work it into your schedule, or just do it the following week instead.  Just call it your cut back week. 



Sunday, January 31, 2016

Running Biomechanics Primer


Hi.  This is another training tips installment.  I am not attempting to teach everyone how to run. Well maybe I am.  This was a neat little study that I did in an attempt to learn different terms that are used to describe the physical aspects of running.  I wanted to improve my technique and a lot of online coaches use very technical terms to describe how to improve your form and technique.  So I did some research and compiled what I learned here.  Because I compiled this information from all over different places, I had to be very inventive to put it all together.

So let's start with some very basic terms in then get into the running part.

Biomechanics is the study of the mechanics (physical actions of forces) as it relates to the functional and anatomical analysis of biological systems (namely humans during running in this blog post). Kinematics is a description of motion in regards to time, space, and velocity.  Kinetics is the study of forces associated with the motion of the body. In other words, kinematics is focusing only on the motion itself and measuring the changes.  Kinetics also takes into account why those changes took place. So a lot of the terms I present in this blog post get's into the kinetics of running. Chock full of science.  You have been warned.

The biomechanics of running and walking are similar but are different in this way.  In walking, there is a point when both feet are touching the ground and that is when weight bearing is being shifted from one leg to the other.   In running, both feet never make contact with the ground at the same time and the leg absorbs the weight bearing just after the foot makes contact of the ground.

The Gait Cycle:

When we refer to the running gait, we are basically describing the biomechanics that are involved with human locomotion (or what your legs are doing as you are running).  It’s the repetitive sequence that’s common to all runners.  Running also involves the arms but we are going to look at first what your legs are doing.  When we describe the different phases and steps, we are going to focus on what one leg is doing at a time.  However, as you are running, both legs are involved in the gait cycle and are doing the same thing, but one leg is close in opposite phase of the other.  They overlap in the swing phase which creates two float stages (or the double flight).  (Note: In a walking gait, the phases overlap in the stance phase creating what is called a double support.)


There are two main phases to the running gait cycle: stance phase and swing phase. The stance phase begins at the moment your foot hits the ground until your foot leaves the ground.  The swing phase begins at the moment your foot leaves the ground until it makes contact with the ground again.  Within each phase is a number of steps or stages.  Within the stance phase you have the following steps (or stages): Contact, Absorption, Mid-stance, Terminal Stance, and Push Off.  Within the swing phase you have Pre-swing, Initial Swing, Mid-swing, Terminal Swing, and Approach.  There are also 2 float (or flight) stages when both feet are off the ground simultaneously.  The first one occurs during the approach step when the swing foot is just about the make contact with the ground and the other foot just left stance phase at push off and is just now entering swing phase during pre-swing.   Since we are looking at gait from the prospective of one leg at a time, the second float step occurs during pre-swing phase just after the foot pushed-off the ground while the other foot is still approaching.  

Phase: Stance Phase                                                     Swing Phase
Steps:   Contact Absorption Mid-stance Terminal Stance Push Off Pre-swing Initial Swing Mid swing Terminal Swing Approach 

And to compare with what each leg is doing together.

L Foot  App Contact Absorption Mid-stance Terminal Stance Push Off Pre-swing Initial Swing Mid swing Terminal Swing Approach 
R Foot Pre-swing Initial Swing Mid swing     Terminal Swing   Approach  Contact Absorption Mid-stance Terminal Stance Push Off
                       ^second float stage                                                                                 ^ first float stage


Before we look at each step of the running gait, let’s define some movements that our body makes. 

Flexion and Extension.  These are actions to the joints of our body and how the connected muscle causes the joint to flex or extend.  So if we say to flex our muscle, what we really mean is that we are bending (or flexing) the elbow joint so that our fist moves closer to our shoulder which makes our bicep muscle really pronounced.  When we flex our elbow, our bicep muscle contracts (shorten) and our triceps muscle lengthen.  If we extend the elbow joint, we move our fist away from our shoulder.  When we extend our elbow, the triceps shorten and our bicep muscle lengthen.  Likewise, say we are seated in a chair with our ankles dangling under us.  If we flex our knee we are pulling our heel closer to our butt which is caused by contracting of our hamstring muscle which also lengthens our quadriceps muscle.  Likewise, if we extend our knee, we are moving our foot away from our butt and stretching our leg way out in front of us.  When we extend our knee, this bending is caused by contracting our quadriceps muscle and lengthening our hamstring muscle.  Flexion refers to making the angle of the joint in question smaller while extension refers to making the joint angle wider.  Dorsiflexion is another way to say extension (opposite of flexion).

In the above figure, the knee is being flexed to perform the squat.
Also notice the ankle is flexed as well (plantar flexion).

In the above figure, the ankle is being demonstrated to perform both plantar flexion and plantar dorsiflexion (extension).
The angle of ankle flexion or extension is measured between the sole and the back of the leg.


Plantar flexion is referring to the way we are bending our ankle joint.  During plantar extension, just think of what happens when you keep your heel on the ground but lift your toes up off the ground.  It’s really an ankle flexion (the angle is getting wider from the sole of your foot and the back of the leg).  This is also sometimes called plantar dorsiflexion.   Plantar flexion is the movement which decreases the angle between the sole of the foot and the back of the leg which brings the toes back towards the ground.  

In the figure above, the left graphic demonstrates pronation of the foot (rolling inward)
while the graphic on the right demonstrates supination of the foot (rolling outward).

Supination of the foot occurs during contact and absorption stages of the running gait cycle when the foot doesn’t roll inward enough (under-pronation) or rolls outward.  Supination can be a result of high arches, tight calf muscles, and weak unstable ankles.  Supination can cause your foot to twist awkwardly and leading to ankle related injuries. A runner diagnosed with supination is recommended stabilizer running shoes which provides extra support and cushion which helps absorb the force from impact during the contact and absorption phases.   These shoes also have a straighter instep shape called a last to control inward motion that counters supination.   Shoes with supportive arches can also help. 

In the figure above, the quadriceps muscle is shown to contract in order to dorsiflex (or extend) the knee.

In the running gait cycle, hip flexion causes our thigh and knee to move in closer to our chest.  Think of coming into a fetal position while keeping our back straight. Extending our hip would bring the knee back down closer to the ground.  If we are standing straight with our knees fully extended, hip flexion would bring our foot off the ground in front of us while hip extension would bring it back down (think of the Nazi march).  Likewise, if we start in the same standing position with the knee fully extended, hip extension would move the leg behind us while hip flexion would bring it back to the standing position.

In the figure above, we see the hamstrings are contracting which results in the knee being flexed and consequently the quadriceps are also lengthening.  We also see that the hip is shown to be in an extended position.


In the figure above, we see three demonstrations of hip movement.
(Left graphic) medial rotation of the hip causes the leg and foot to turn inward while lateral rotation causes the leg and foot to turn outward. (Center graphic) Hip flexion raises the hip off the ground in front of the body while extension causes the leg to return to the ground and even pull slightly behind the body. (Right graphic) Hip abduction causes the leg to raise outward laterally (feet apart) while hip adduction brings the feet together.

In the figures above, we see two demonstrations of varus momentum on the knee (bending or twisting of the knee inward). 
This is also known as knee knocking. In the figure on the right, we compare varus rotation with valgus rotation.

Varus torque is created by applied forces that are exterior and below the knee joint which causes varus momentum or torque at the knee.  This causes a bending or twisting of the knee inward.  This is compared to valgus torque that is created by applied forces that are interior and below the knee joint. This causes valgus momentum or torque at the knee. 

Concentric contractions refer to a muscle that is actively shorting to generate a force.  When a muscle is activated and required to lift a load, the muscle begins to shorten.  An example of a concentric contraction is the bicep muscle shortening while raising weight during a bicep curl.  Eccentric contractions refer to a muscle actively lengthening usually in response to a greater opposing force.  When an opposing force is acting on the body and the muscle is activated to control or deaccelerate the motion of that body part, the muscle that is being elongated is said to be using eccentric contraction. An example of eccentric contraction is the hamstrings muscles when the body is lowered during a squat.  In this case, eccentric contraction is used to provide balanced tension to control the speed and range of motion during the decent.

Now that we understand the various motions related to biomechanics, let us look at each step in the running gait more closely.  Again, here is a graphic of the running gait.


Note: I attempted to combine different sources on the running gait and the specific movements within each step. There are different running styles that will diverge from what I write below.  And your particular running style may be a bit different as well.  This is to give you a general idea on the mechanics and to introduce terms used when describing the biomechanics.  This is also the style that I am trying to strive to implement into my running mechanics.

Contact: This is when the foot initially makes contact with the ground.  You will hear terms like heel striker, toe or forefront striker, or midfoot striker.  These terms refer to which part of the foot makes the initial contact during this step.  If the heal makes contact before any other part of the foot, then you are classified as a heel striker.  Likewise if the toes or the front of your foot makes the initial contact, then you can be described as a toe or forefoot striker.  Lastly, if the middle part or the ball of your foot makes the initial contact, then you are a mid-foot striker. 

Absorption: After the contact step we move into the absorption step or the absorption stage.  Sometimes this is referred to the loading response stage.  In the walking gait, loading response occurs when the foot makes contact and ends when the opposite foot enters toe off (remember both feet are on the ground simultaneously).  During loading response, weight is shifted from one leg onto the other.  In running, the feet are never on the ground simultaneously. We anticipate weight to shift from the weight bearing foot that undergoes push off to a neutral position during the float or flight stage and then to the new weight bearing foot during the absorption stage after initial contact has been made.  Sometimes this stage is also known as the braking stage because in effect, your body is performing a controlled landing.  Your feet, ankle joints, shin, knee joints, quadriceps, hips, and spine are all absorbing the shock that is caused by the ground during initial contact.  The knee joint and hip joint flexes while the foot pronates. During this step, a heel striker’s ankle will plantar flex as the rest of the foot makes contact with the ground while a toe striker’s ankle will plantar extend or dorsiflex.  Foot pronation will continue into the mid-stance and terminal stance stages all the way through push off.  During the absorption stage, the tendons and connective tissue within the muscles store elastic energy that will be used later in the stance phase. 

Important in the early stages of the stance phase is pronation (or in some cases- supination) of the foot.  Pronation of the foot begins to occur after contact during the absorption stage of the running gait cycle when the foot rolls inward.  Pronation helps your feet absorb shock and adapt to uneven surfaces.  If your foot rolls too far, then you over pronate and that can cause problems to feet, legs, knees, hips, and back.   

Loading is referred to the different forces and momentum felt by the body in reaction to the ground’s forces being applied to the body.  So when we enter the initial contact stage, there is a sudden increased amount of loading experienced by the weight bearing leg.  Remember Newton’s Third Law: For every action there is an equal and opposite reaction.  Now let’s look at Newton’s Second Law: Acceleration is produced when a force acts on a mass.  To put it a little different in prospective of what we are talking about, force is equal to mass times acceleration (or change to velocity).   The action and opposite reaction that we are looking at to loading and loading response has to do with the different forces being applied to the entire lower body and the opposite forces being applied back by our muscles in order to sustain a forward movement of the entire body.  The force being applied to the ground by our body during the stance phase of our running gait is directly related to our mass and the vertical acceleration towards the ground caused by gravity.  However, this is not the only ground reaction force acting on our body.  This would be true if we were jumping up and down on one leg.  However, with running, there is inertia that propels our body forward (horizontal movement) that has an effect on this loading reaction as well.  

The ground reaction forces change as we move from initial contact, during absorption, mid stance, and finally into terminal stance.  In the absorption step, our forward weight bearing leg is a bit out in front of our center of mass.  Ground reaction forces travel up the leg starting behind the ankle joint and travels posterior to the knee joint and anterior to the hip joint.  The angles produced on this leg (hip angle, knee angle, and ankle angle) are all as a result from the reaction to the ground forces.  During absorption, there is an initial loading response which causes a plantar flexion in our ankle joint combined with a pronation or supination due to a secondary reaction lateral to the subtalar axis.  Then there is a flexion movement at the knee joint combined with a varus torque due to a reaction that is medial to the knee joint. Lastly, the hip flexes combined an adduction momentum due to a secondary reaction that is medial to the hip joint.

During absorption, the body will control the movements with eccentric activity in the ankle dorsi flexors along with eccentric activity in the intrinsic foot muscles and other supinator muscles to control subtalar pronation. There is eccentric activity in the knee extensors along with passive tension in the lateral knee structures. Active force in the tensor fascia lata could contribute to knee stability in the frontal plane.  At the hip control is managed by isometric activity in the hip extensors and activity in hip abductor muscles.

Mid-stance: The braking action which is first experienced in the absorption stage continues but terminates into the mid-stance stage. At this stage, the foot is directly under the hip and the body is experiencing peak loading.  As we move into the mid-stance stage, the amount of loading on that leg is increased to its maximum as the full amount of weight is being supported by that leg. 

Also related to the shift of weight is that our center of mass is at its lowest during the mid-stance stage.  About as much as we hear about proper form to include having the foot land under your center of mass during initial contact, the foot will actually land slightly in front of it which also contributes to the braking action.  The closer the foot lands to the center of mass, the less force the body needs to apply to overcome loading.  The further the foot lands in front of center of mass, the stronger the loading forces being applied to the body and the more force the body has to apply to overcome these forces.   If loading forces is greater than what the physical body can sustain, injuries to the body can occur.

During mid-stance, the center of mass is at its lowest and the foot is directly under it and is now moving behind it. At mid-stance our knee joint no longer continues to flex, and our hip joint goes from a flexion action to an extension action caused by our hip flexors to switch from eccentric contraction to concentric contraction. Concentric contraction of the hamstring and hip flexors means that we are purposely using our muscle to move the leg backwards forcibly. 

Let’s look at how the reaction to ground forces change in the mid-stance step. The normal ground reaction force is now acting anterior to the ankle joint, anterior to the knee joint and posterior to the hip joint.  The change in the ground reaction forces causes a plantar dorsiflexion action (pronation continues), an extension of the knee (the varus movement continues), and an extension of the hip (the adduction movement continues).     

During mid-stance, the ankle will control the movements with eccentric activity in the plantar flexors and activity in the intrinsic foot muscles, soleus, and other supinator muscles (in order to supinate the subtalar joint to make the foot more rigid to bear the body's full weight). There is a passive force which develops in the posterior knee structures as they elongate during knee extension and passive tension in the lateral knee structures. Active force in the tensor fascia lata could contribute to knee stability in the frontal plane.  Lastly, there is eccentric activity in the hip flexors along with activity in hip abductor muscles. 

Terminal Stance: As our foot is moving behind our center of gravity, it will get to the point where the hip joint will extend back as much as possible.  You may hear this as the propulsion stage because from mid-stance through terminal stance until your foot leaves the ground, your leg is propelling you forward.  Our muscles also shifted from eccentric contraction to concentric contraction.  Eccentric contraction is found in the early parts of the stance phase during absorption and loading.  Those eccentric forces react against the ground forces to control our landing and prevents us from doing a face plant.  Concentric contraction forces are the forces that powers the run.  During the terminal stance stage, we are now purposely flexing the knee and ankle joints as well as extending the hip joint forcing the leg muscles to propel us forward and will help us push our foot off the ground.  We are also gathering potential energy in our leg that will eventually sling our leg forward during the swing phase. 

Let’s look at how the reaction to ground forces change in the terminal stance step.  The normal ground reaction force continues to act anterior to the ankle joint, anterior to the knee joint and posterior to the hip joint.  However, the normal ground reaction force has shifted from lateral to now medial to the axis of the subtalar joint.  This causes a shift of pronation to now a small supination movement at the subtalar joint.  The ankle responds by in the ankle plantar flexors which have acted eccentrically through mid-stance, now act isometrically. The continued advancement of the pelvis and lower extremity now move the tibia anteriorly, which causes the heel to rise at around 35 to 40 percent of the gait cycle. There is also activity in the intrinsic foot muscles, soleus, and other supinator muscles. These muscles augment supination in order to supinate the subtalar joint and produce an increasingly rigid foot.

There is a continued extension and varus movement in the knee. Therefore, the passive force in the posterior knee structures and passive tension in the lateral knee structures continue to stabilize the knee.  Likewise, there is continued extension and adduction in the hip.  The body responds with eccentric activity in the hip flexors and activity in hip abductor muscles.    

Push Off: Finally we come to the very end of the stance phase in the gait cycle and begin to enter into the swing phase.  Here the foot comes off the ground caused by concentric contraction of our hip flexors and hamstrings. The ankle is fully flexed with the toes pointed as back as they will go.  This is caused by concentric contraction of the plantar flexors which actually pushes our toes off the ground like a spring. 

Pre-swing: So now we are entering into the first stage of the swing phase of the gait cycle.  You should also be aware that we are also in the first float stage as the complimentary foot (the other one) is just about to leave the swing phase in the approach stage. This stage ends when the complimentary foot makes initial contact and the leg begins to sling forward.  This stage is also known as forward recovery stage.  During this stage, the knee joint continues to flex by concentric contraction of the hamstrings which forces the heel to rise up towards the buttocks.  You will also want to make a conscious effort to activate the glute muscles to provide extra power.  This stage is called the pre-swing stage because we haven’t yet slung the leg forward.  We are still using concentric contractions in our glutes and hamstrings to build up enough energy that will eventually sling the leg forward in the initial swing stage.  From mid-stance into the pre-swing stages, we are using concentric contractions to not only propel us forward, but to reserve the elastic energy that will sling the leg forward.  In pre-swing, we are following through with what we started in the late stages of the stance phase. 

Think of a wind-up toy car.  When you pull the car back on the ground, you are creating a lot of elastic potential energy. The gears inside the car cause tension to collect in the spring so that when you let the car go, the car flings forward automatically.  Likewise, from mid-stance all the way into pre-swing, we are applying the similar concentric contraction that will in effect cause passive motion throughout the remaining stages of the swing phase.  Although you hear about driving the knee forward, the most efficient way to move the swing leg forward is by letting it go and let it naturally move forward using passive motion.  Passive motion is the involuntary momentum after we reached the full range of motion as opposed to active motion caused by concentric contractions which drove our leg backwards during the later stages of the stance phase.  Another way of looking at it as pulling back on a rubber band then letting it go.  Active forces creates the tension in the elastic when we pull the rubber band apart, while passive forces fling it forward once you let go.   Although this is the first stage in the swing phase, it is the last stage we are using active motion, in this case the knee being fully flexed by raising our ankle up towards the buttocks. 

Initial Swing: As our complementary leg and foot begins to absorb the ground forces and load is being applied to it, the swing leg can relax and the initial stage of swinging the leg forward can now begin using passive motion.  At this point we will be executing eccentric forces on both legs.  On the complimentary leg, it is absorbing the shock and taking load in reaction to ground forces and bearing the weight to support our body.  In the swing leg, eccentric forces in our hip are used to assist our abductors to prevent pelvic drop on the swing side of our hips. We also want to keep our knee high and fully flexed at this point which will minimize the radius of the swing (compact movement) which will in return shorten the time it takes to swing the leg as well as preserve energy.  So our hips, glutes, lower back, and core are all being used to stabilize our body and keeping it upright. 

A thing to keep in mind is that passive momentum will drive the knee forward and not concentric contraction.  In other words, you do not force the knee to drive forward, it just happens naturally as a result of the steps prior to it. 

However, you can make a conscious movement to promote forward motion.  This is commonly known as the fall.  During initial swing, you will want to “fall forward” but in a way to keep your body upright and stable.  This will minimize the vertical oscillation (the head and body bouncing up and down as we move forward) which promotes a more graceful stride.  This more graceful stride will prevent the unnecessary vertical movements that results in wasted energy.

In the figures above, we see Meb demonstrate good upright posture on the left.  On the
right, Sage demonstrates a good forward lean that comes from the ankles and not the hips.

To “fall forward” correctly, you will want to slightly lean forward from the ankles (not the hips) whereby the upper body is straight and upright that continues from the hips to the top of the head.

Mid-swing: At mid-swing, our tibia bone is completely vertical to the ground and the weight of our body is completely supported by our complimentary leg.  We continue to stabilize the hip to prevent pelvic drop and maintain the high knee.

Terminal Swing: During this stage we continue to flex our hip using passive forces but we now relax the muscles which will allow our knee to dorsiflex.  This allows our leg to come forward to its full range of motion which influences our stride length.  With our knee dorsiflexing (extending), the foot swings out forward in front of our center of mass but the knee remains slightly bent.  The glutes and adductors help keep our pelvis stabilized.  We reach the end of this stage when the hamstrings decelerates hip flexion and the knee is brought as forward as far it will go. At this point our foot it in front of us with knee relaxed and ankle dorsiflexed which may cause our toes to be pointed upward and heel lowered. 

Approach: This is the final stage of the swing phase and just so happens to be the second float stage as our complimentary leg just pushed off the ground and is now entering into pre-swing. This stage will end when the foot finally comes into initial contact with the ground.  At the beginning of the approach, the knee is dorsiflexed with the foot further out in front of our center of mass.  As the foot is approaching contact, passive forces will actually flex the knee to prepare for the shock of the impact forces of the ground and loading reaction to bearing weight onto that leg.  The same passive forces will move the foot backwards and flex the ankle.  This will enable the foot to land more level and closer to the center of mass.  This passive force is sometimes referred to as the paw back.  While it is involuntary motion due to momentum, there are drills that can be performed that will reinforce muscle memory to make this action more pronounced.  This passive force is also the same force that will create momentum during the early part of the stance phase which will bring the leg backwards until mid-stance. 

A common misconception is that you can somehow use concentric contraction in the quadriceps to force this paw back motion.  The muscles are too weak to overcome gravity to assist the already natural motion of bringing your foot back closer to the center of mass prior to initial contact. 
Depending how much (or little) the ankle flexes will determine if you are a heel, midfoot, or toe striker. Keeping the knee relaxed during terminal swing stage will encourage a more forefoot landing as opposed to a heel strike.  When the knee is fully extended during terminal swing, the foot cannot come back far enough during the approach stage and thus encourages a heel strike that will cause injuries since reaction to ground forces is not being properly absorbed by the muscles that can most efficiently absorb them. 

Strides and Steps: The complete gait cycle occurs from the moment one foot makes initial contact with the ground until that same foot makes initial contact with the ground again.  You can also imagine that the complimentary foot has pushed off the ground twice.  The distance covered by the first leg when it completes the entire gait cycle is known as the stride.  The distance covered from the time one foot pushes off the ground until it makes initial contact with the ground is known as the step.  Each foot makes a single step in a complete stride.  Running cadence is usually measured by the number of steps taken by both feet per minute.  If we are measuring by strides, then it is the number of steps taken by only a single foot per minute.  For example, a particular cadence could be thought of as 180 steps per minute.  That same cadence can be thought of as 90 strides per minute. 

Arms: The arms should automatically be in synch with the opposite leg. So while the right leg is in the swing phase, the left arm should also be swinging forward. Likewise, while the left leg is in a stance phase, the right arm is pulling backwards.  Just as the swing phase of the leg is passive caused by the concentric contraction during the stance phase, likewise the arm is swung forward passively while we use concentric contraction to pull the arm backwards.  The movements of the legs and arms do not cross our hemisphere.  What that means, if you drew a line from the top of your head down the middle of your body, no body part crosses over from the left side to the right side (or vice versa). If the arms or hands cross over into the other hemisphere, that is making inefficient movement and wastes energy. That wasted energy adds up during the course of an entire long distance race which will degrade both pace and overall time. The following graphic depicts the concept of the runner’s hemisphere.

In the figure above, we draw a line down the middle of the runner’s body creating a left and right hemisphere.
The right arm, elbow, hand, foot, knee and leg remain in the right hemisphere at all times.
The left arm, elbow, hand, foot, knee, and leg remain in the left hemisphere at all times.


The arms should swing back and forth like pendulums. Think of a grandfather’s clock. The elbows are bent at 90 degrees and shoulders and neck relaxed and forward so the arms swing low and relaxed.  When the neck and shoulders tense, energy is required to tighten those muscles which adds no benefit to the running gait.  As a result, energy is wasted and those muscles will eventually tire.  Also, when the arms swing back and forth, the movement should be tight and compact to the body so the hands almost brush up against your hip. They should be moving parallel to the motion of our body moving forward.  You will want to eliminate as much as possible any horizontal motion either into or out of the hemisphere.  Also, do not make a tight fist as this also requires energy that does not benefit the running gait. Keep the fingers closed but relaxed. Think of holding a delicate piece of paper between your fingertips and thumb.